One more black coat

It may be March, but it is still winter in Minnesota, and today there is a winter storm warning for possibly 10 inches of snow! Our overcoat season is interminable, and I decided to make a new coat this year to help endure it. The upside to our long winters is plenty of time to finish a coat project.

My entire family gives me grief about my –ahem- large collection of black coats. And I admit, I may be rather stuck on black when it comes to winter outerwear. So no one was surprised when I chose an excellent black wool from emma one sock. It is no longer available- but if you are more broad minded about color, there are several options here.

IMG_1924.jpg

My plan was to use this snappy vintage vogue pattern that I previously made into a spring coat:

But, here is where the story gets even darker- when the coat was nearly done, and I was trying it on for finishing, I discovered the fit was off.  The fabric is lovely and dense but not at all bulky- this affected the drape and silhouette. 

I didn’t want to chuck the project- coating fabric is an investment. (Although, I did have to set this aside for a cooling off period.) After that, I committed to a do over. I think one key to sewing success is willingness to take a project apart and start all over again (read- seam ripping). Committing to a remake has a lot to do with ending up with clothes I want to wear. 

IMG_4083.jpg

So- I ripped out the side seams and removed the sleeves and the back body piece from the back yoke.  I kept the collar and front intact.  Then, I narrowed the shoulders and recut the back eliminating some of the fullness and reattached the back to the back yoke. Finally, I reset the sleeves.  The sleeves are not as flawless as the first endeavor, because of the fiddling. 

Even so, I am happy with the overall silhouette and fit now.  I really appreciate the two piece sleeves- they are comfortable and provide great ease of movement.  I also love the easy, subtle and deep pockets- and the spiffy collar. Yes -that is a snap used for the top closure- called for in the pattern!

IMG_1925.jpg

Taking a peek at the lining. It is not black!

IMG_1931.jpg

Tried to get an outdoor photo between snowfalls- but the snow flakes kept swirling!

IMG_5288.jpg


So50visible challenge

When I recently dove headfirst into the online community of sewists, I expected to find inspiration to nourish my creative side.  What I didn’t expect is that I would also have an opportunity to be an activist. So, I was surprised and thrilled when I discovered Sewover50 and their Sew50visible challenge specifically aimed at raising awareness and calling for pattern makers to include older models on pattern covers and in other marketing for the pattern.

Here is the deal for this challenge: you have to submit a new or recent make of a pattern that features an older model in the styling.

No need to ask twice for me to be completely on board with this. 

I started searching for patterns with older models.  Unsurprisingly, it took effort, and the choices were slim. The bright side of this search is that I discovered several independent pattern designers that were new to me.  Among the options that qualified, I found the fabulous Romero pant pattern by Pauline Alice.  BINGO!  I have been meaning to try a wider leg pant and now I had a reason to do it.

IMG_1848.jpg

First, some praise for the pattern. I love, love, love the clever button/pocket closure construction scheme for these pants. Romero is closed by buttons on the sides and waistband. You will be happy to learn the pockets are fully functional, and I really appreciate the clean finish with French seams. 

I obtained the PDF download and the pattern and instructions were crystal clear.  I also appreciate the great video instructions at the Pauline Alice website- no need to speak French.  I did add my own modification/suggestion to this construction scheme.  I put the second waistband button on the inside of the waistband to reduce overall buttons showing on the front.

IMG_1668.jpg

It has been a minute since I made a pair of fitted pants.  I foolishly sewed these up (quickly) going by my waist measurement only.  In the end the waist fit was fine- but too tight elsewhere.  I didn’t want to remake the pocket construction- and I didn’t have enough fabric on hand to recut the front, so I took out the back, and recut the whole back pattern piece with a full-butt adjustment- or in gentler terms- adjustment for a naturally round derriere!  I follow these fabulous instructions from Colette when modifying a pant pattern.  And now though they are not perfect, they are a pretty good fit.  Next time, I will go up a size also.  I used a light-weight denim with a bit of stretch from my stash. In the end, it is a satisfying fit story. 

IMG_1764.jpg

One word of caution for this pattern- I am 5’4” and usually never have to worry about length, but these pants are short.  There was very little length for a hem- I had to use some wide hem tape in order to get a one inch hem at this length.

IMG_1706.jpg


Sweatshirt in Liberty of London fabric

I am a huge fan of Liberty of London fabric.  Choosing a print can be tricky- but choosing a pattern from Liberty of London is easy.  Every Liberty print is fabulous- you can’t make a mistake.  So when I saw that there was a Liberty print available in a cozy fleece from the absolutely charming Guthrie Ghani Fabric Shop- I couldn’t resist.  What could be better than an everyday sweatshirt in an extraordinary print? I ordered the Liberty Ruby Templar A Linford Fleece Backed Cotton Sweatshirt Fabric and I am glad I did because it wasn’t around for long! You can find Liberty of London sweatshirt material here.

IMG_1477.jpg

Ordering from this lovely fabric shop was a snap- the yardage arrived surprisingly swiftly- and included a friendly note from staff. 

The fabric was even better in real life. The print and colors are amazing and the material is super soft and cozy!! You can glimpse the softness on the back face of the fabric and some hand sewing on rolled neck in progress.

IMG_1001.jpg

The most difficult decision for this project was choosing a sweatshirt pattern.  I absolutely couldn’t decide, so oops- I made two (I promise to pass one of these off). When a project is simple- it is difficult to stop at one.

Here’s the version that I made from the trusty Grainline Linden.  This particular Liberty fleece fabric has practically no stretch- minor inconvenience. Happily, the Linden is roomy, so no worries. Because of the lack of stretch and the posh patterning, i decided to eliminate the sleeve cuffs and banded hem. My model is very similar to Lauren’s - adorable owner of Guthrie and Ghani.

IMG_1525.jpg

For the second, I used this Simplicity pattern which is a bit more refined (boring?).  The lack of stretch in this model was more challenging- wish I had a smaller head. 

IMG_1493.jpg

Now that they are both finished I still can’t decide which model I prefer.

 But I know I love the print!

IMG_1384.jpg

Shift Shape

This dress is a real workhorse. It couldn’t be more useful or easy.  It is a one and done outfit and it will work for all seasons. 

Let’s talk about the style first- I am a longtime fan of the shift dress.  It is well documented that a shift dress is pretty much timeless, ageless and universally flattering. But don’t be fooled by the simplicity of this style. A good shift takes thought and effort. The best shifts have shape and fit well.

For this shift dress I started with my well-worn Simplicity 2584 Cynthia Rowley pattern-regrettably now discontinued. There are so many shift dress patterns out there- but don’t be sidetracked by the sleeves or necklines. Find the cut that works best for your body and then you can swap out necklines and sleeves easily. This particular pattern is drafted with a narrow and subtly fitted back and slight A-line. The narrowed and curvy back gives the dress a nice shape.

IMG_0601 (1).jpg

As much as I love this pattern, the dart placement is not optimal for me- so I have to fiddle with that. My short-cut, simple pattern hacking fix is to use a bodice front pattern piece from another pattern with a better fitting dart placement. I simply line up the waist line and shoulders and draw in a new dart. You will also note that I fiddled with the neckline - omitted the slit and opted for a plain jewel neck- and I modified the sleeves a bit.

IMG_0639 (1).jpg

A useful dress for taking care of business!

Now let’s talk about the fabric: I used a nearly perfect cotton that I purchased from Mood Fabrics with a little bit of elastane for stretch.  I absolutely love this type of cotton stretch fabric because it has great body, it isn’t clingy, it doesn’t wrinkle and it moves with you!

This particular fabric is unavailable- but there are so many stretch cotton woven fabrics to choose from here.

Extra bonus- these black and white checks will work in every season- just add (or subtract) tights.

IMG_0641.jpg


Pattern love

This post is devoted to one of my best loved, most often used patterns. 

I LOVE this Vogue apron pattern.  This is what I am wearing today - while making special dinner at home for my Valentine - and what I wear whenever I need to be fancy in the kitchen.

IMG_1174.jpg

At first glance, this may look like a superfluous pattern- done up in silk organza on the pattern illustration.  But don’t be fooled- this pattern is a workhorse. The pattern has great curved seam finishes and a nice shape and -well- it fits everyone perfectly! How great is that?!  This is a pattern I do not fiddle with and cannot improve upon.  I have made this apron countless times. While I typically make it in cotton or linen, I have actually made it in silk twice- as shown above and below.  I have made several of these aprons for the family and others to give as gifts.


IMG_1132.jpg

Apron GLAMOUR!

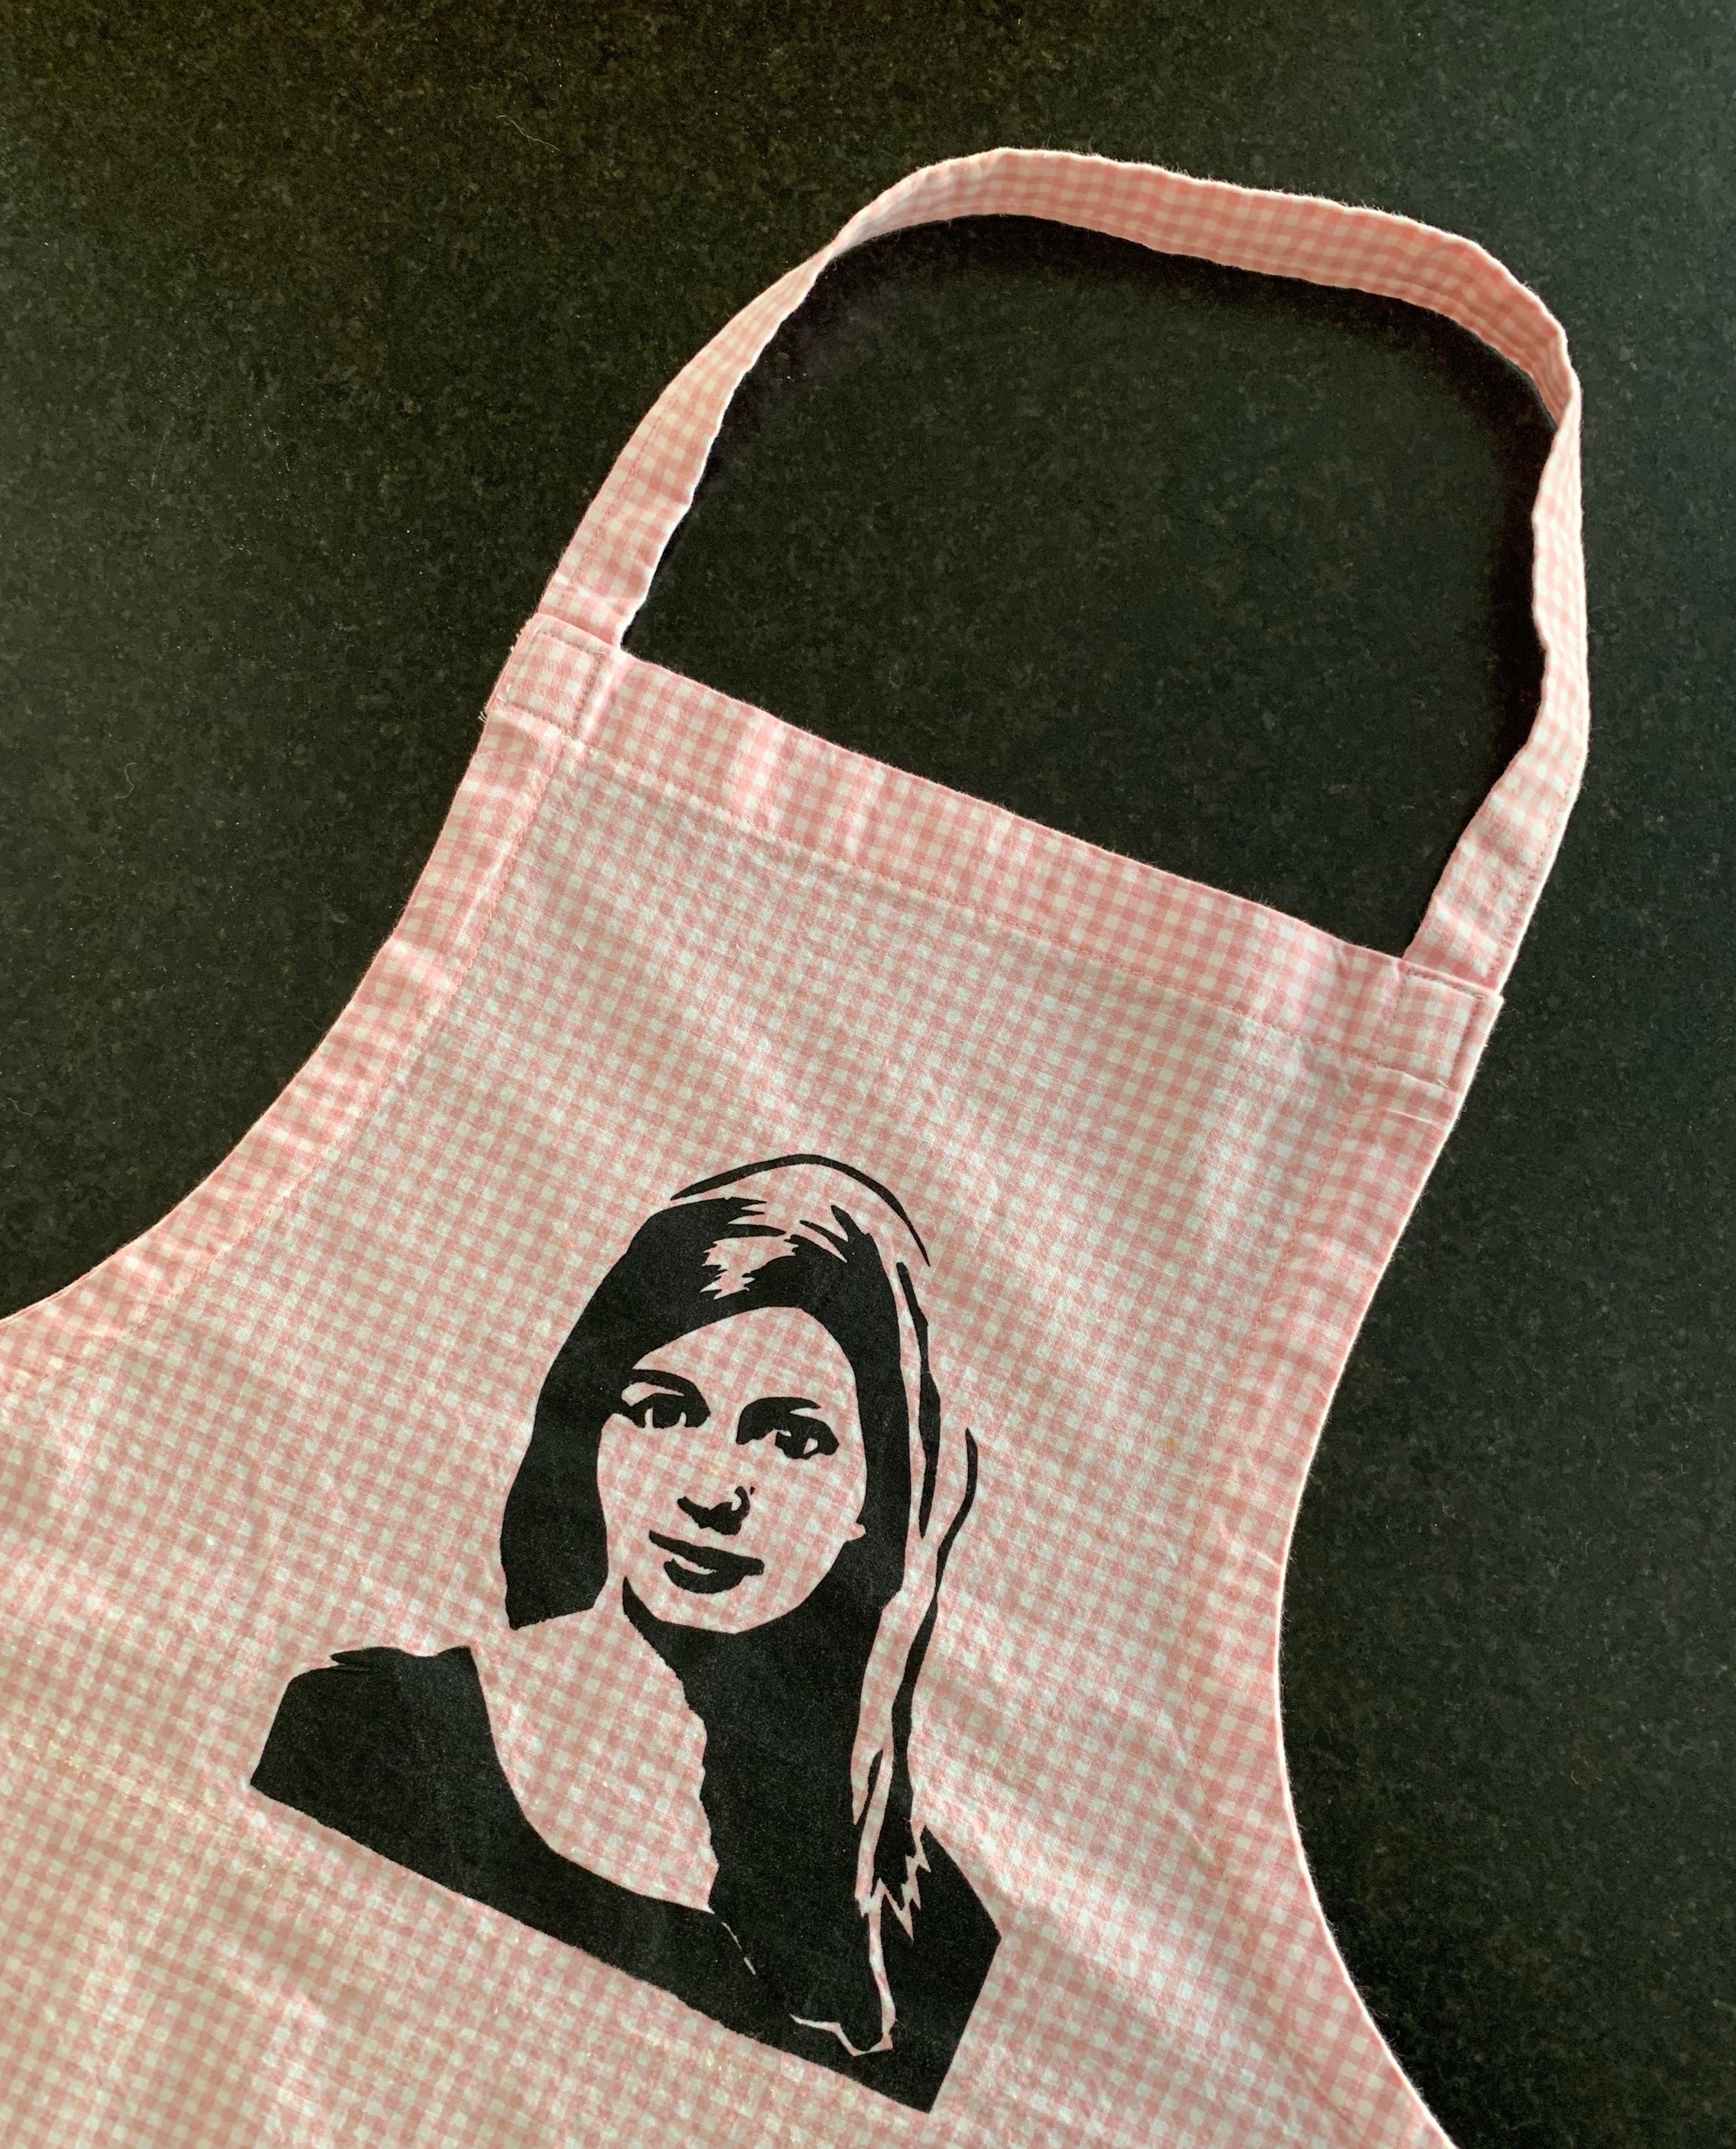
For a recent bridal shower and a few very special parties, I made up three or more of these aprons for daughters and helpers to wear in a fabric to match the party theme/décor- yes, I am that kind of person.  And because middle daughter has genius silk screening skills, we silk screened youngest daughter’s image on this apron -made up in gingham- for her high school graduation party.  Don’t look closely at the seam work- you know I was making this in a hurry.

IMG_1314.jpg