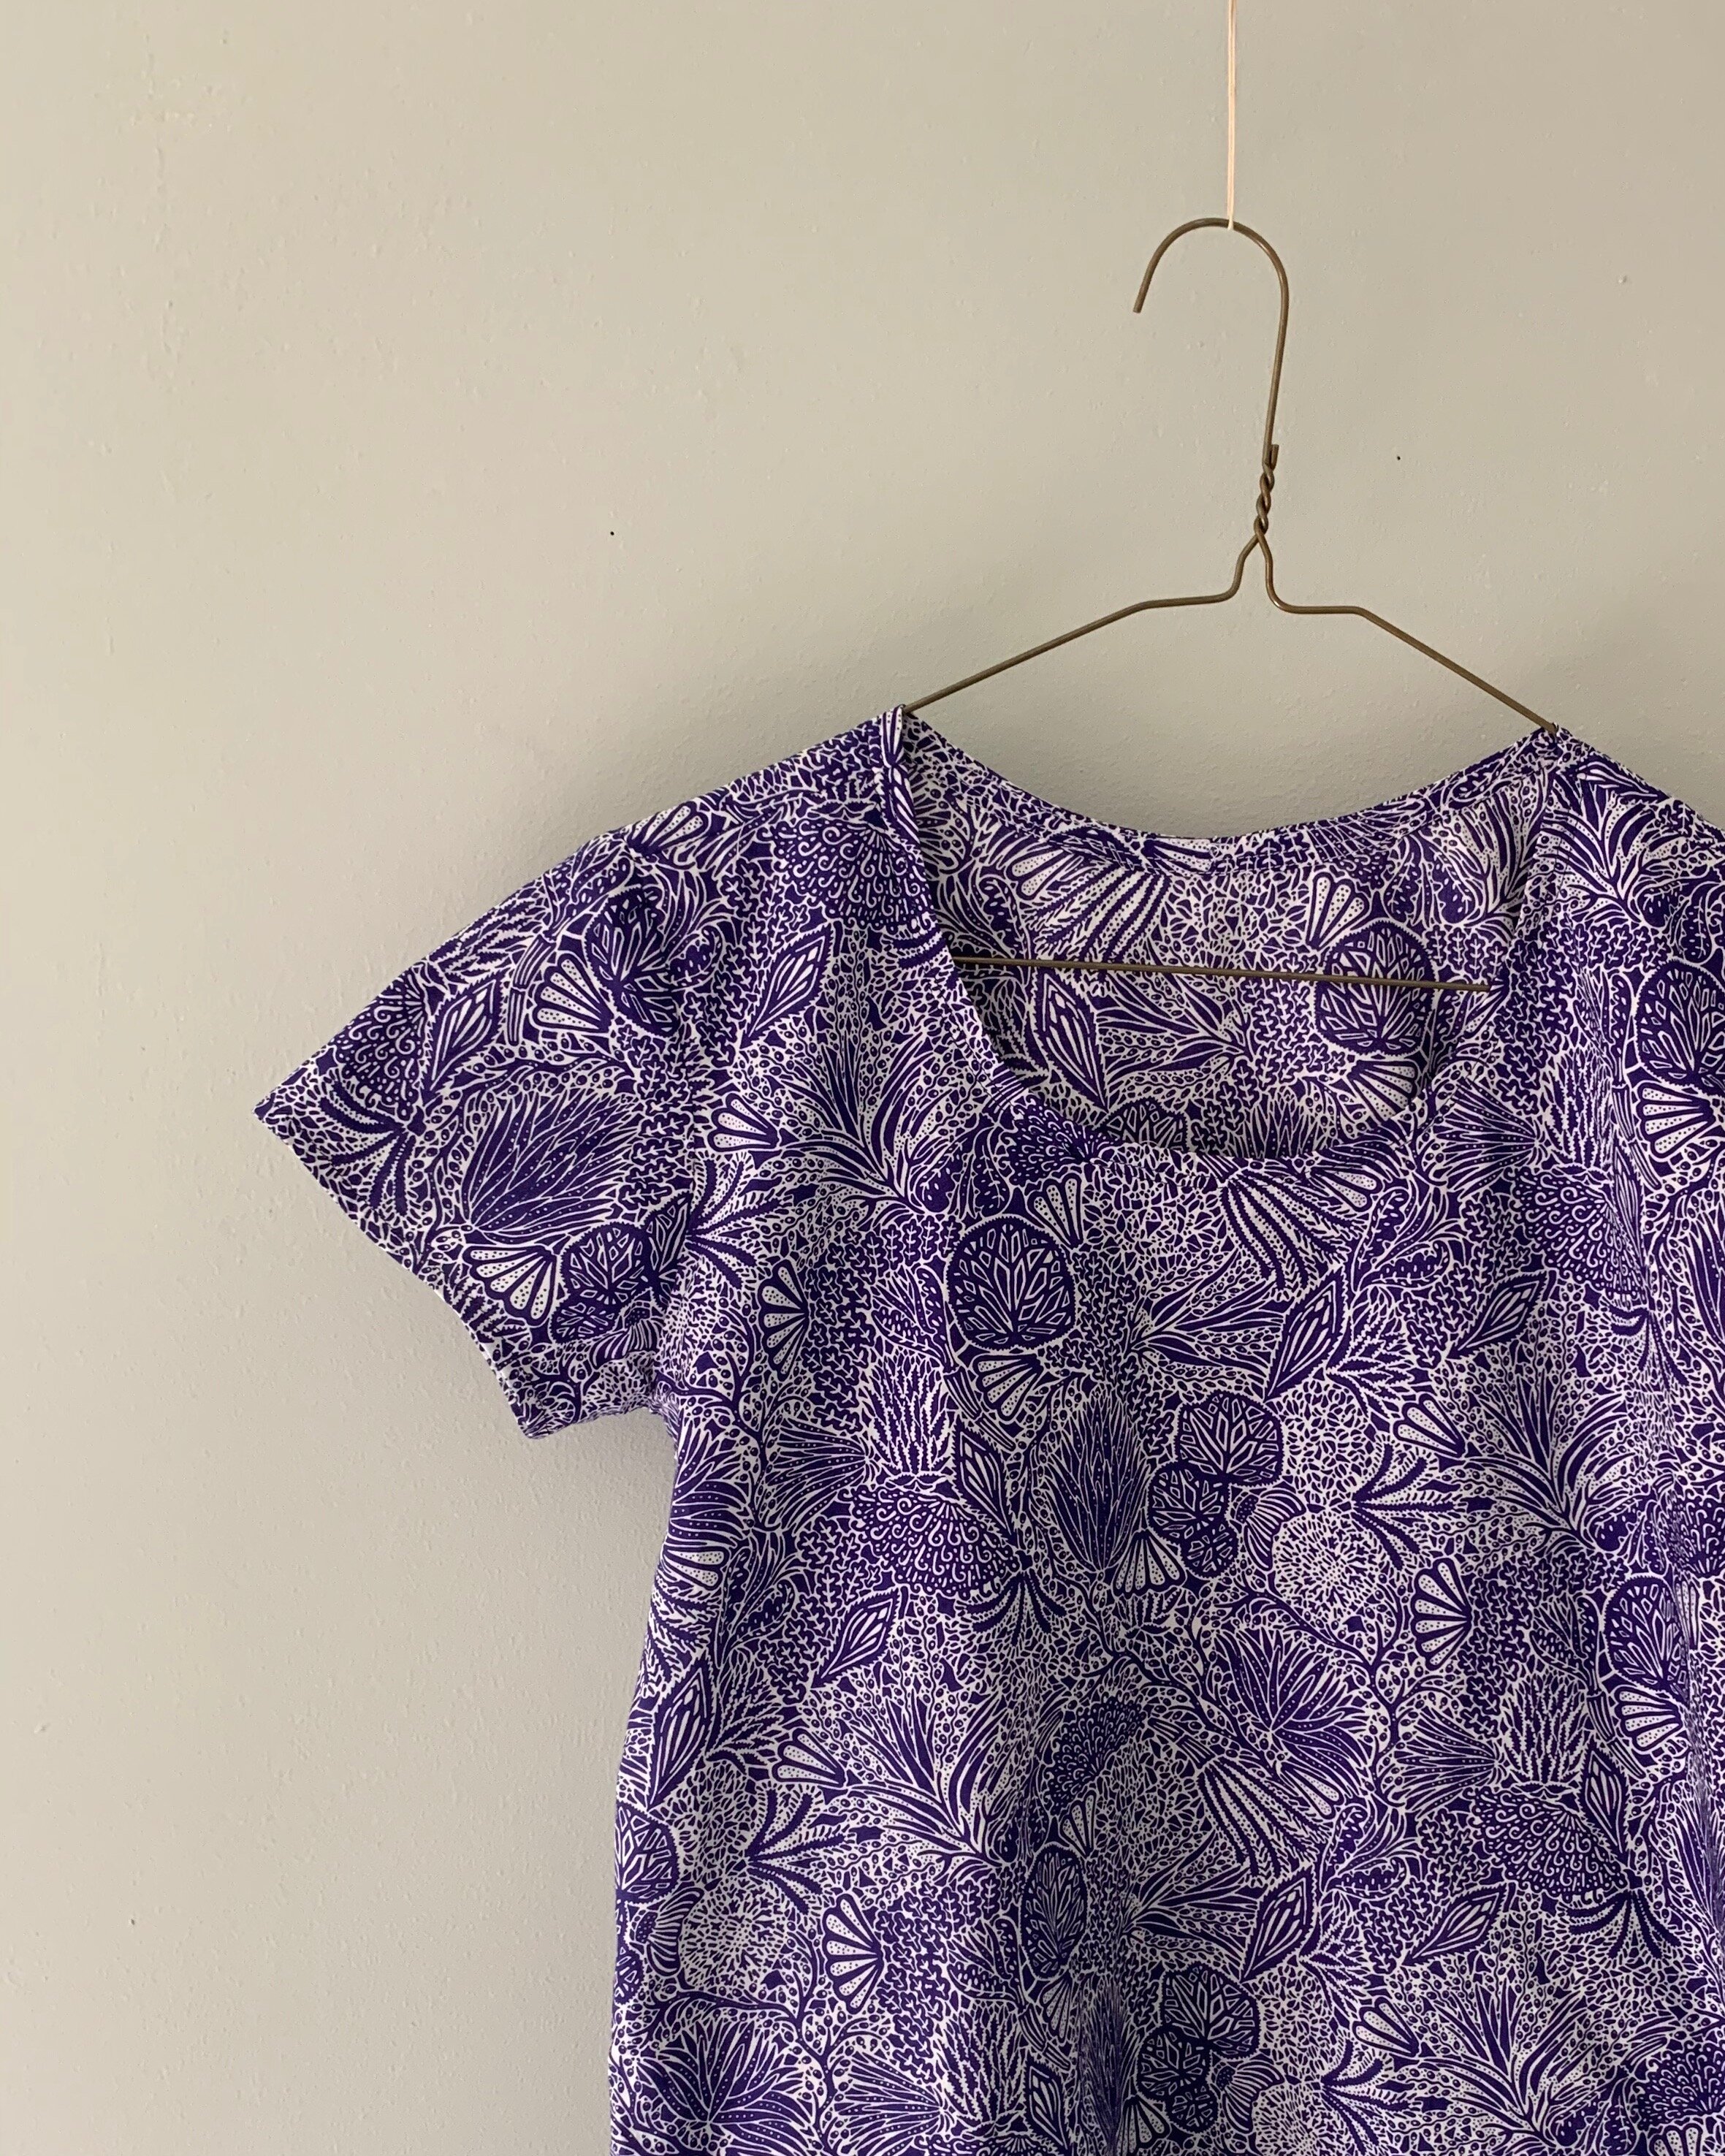
Paradox dress

What came first: did I imagine this dress or did I copy it from ready to wear? This dress represents the classic chicken or egg paradox. I might have come up with the design for this easy summer play dress, or I may have simply reinterpreted a great dress I glimpsed online in ready to wear- I really can’t remember which came first. 

IMG_6996.jpg

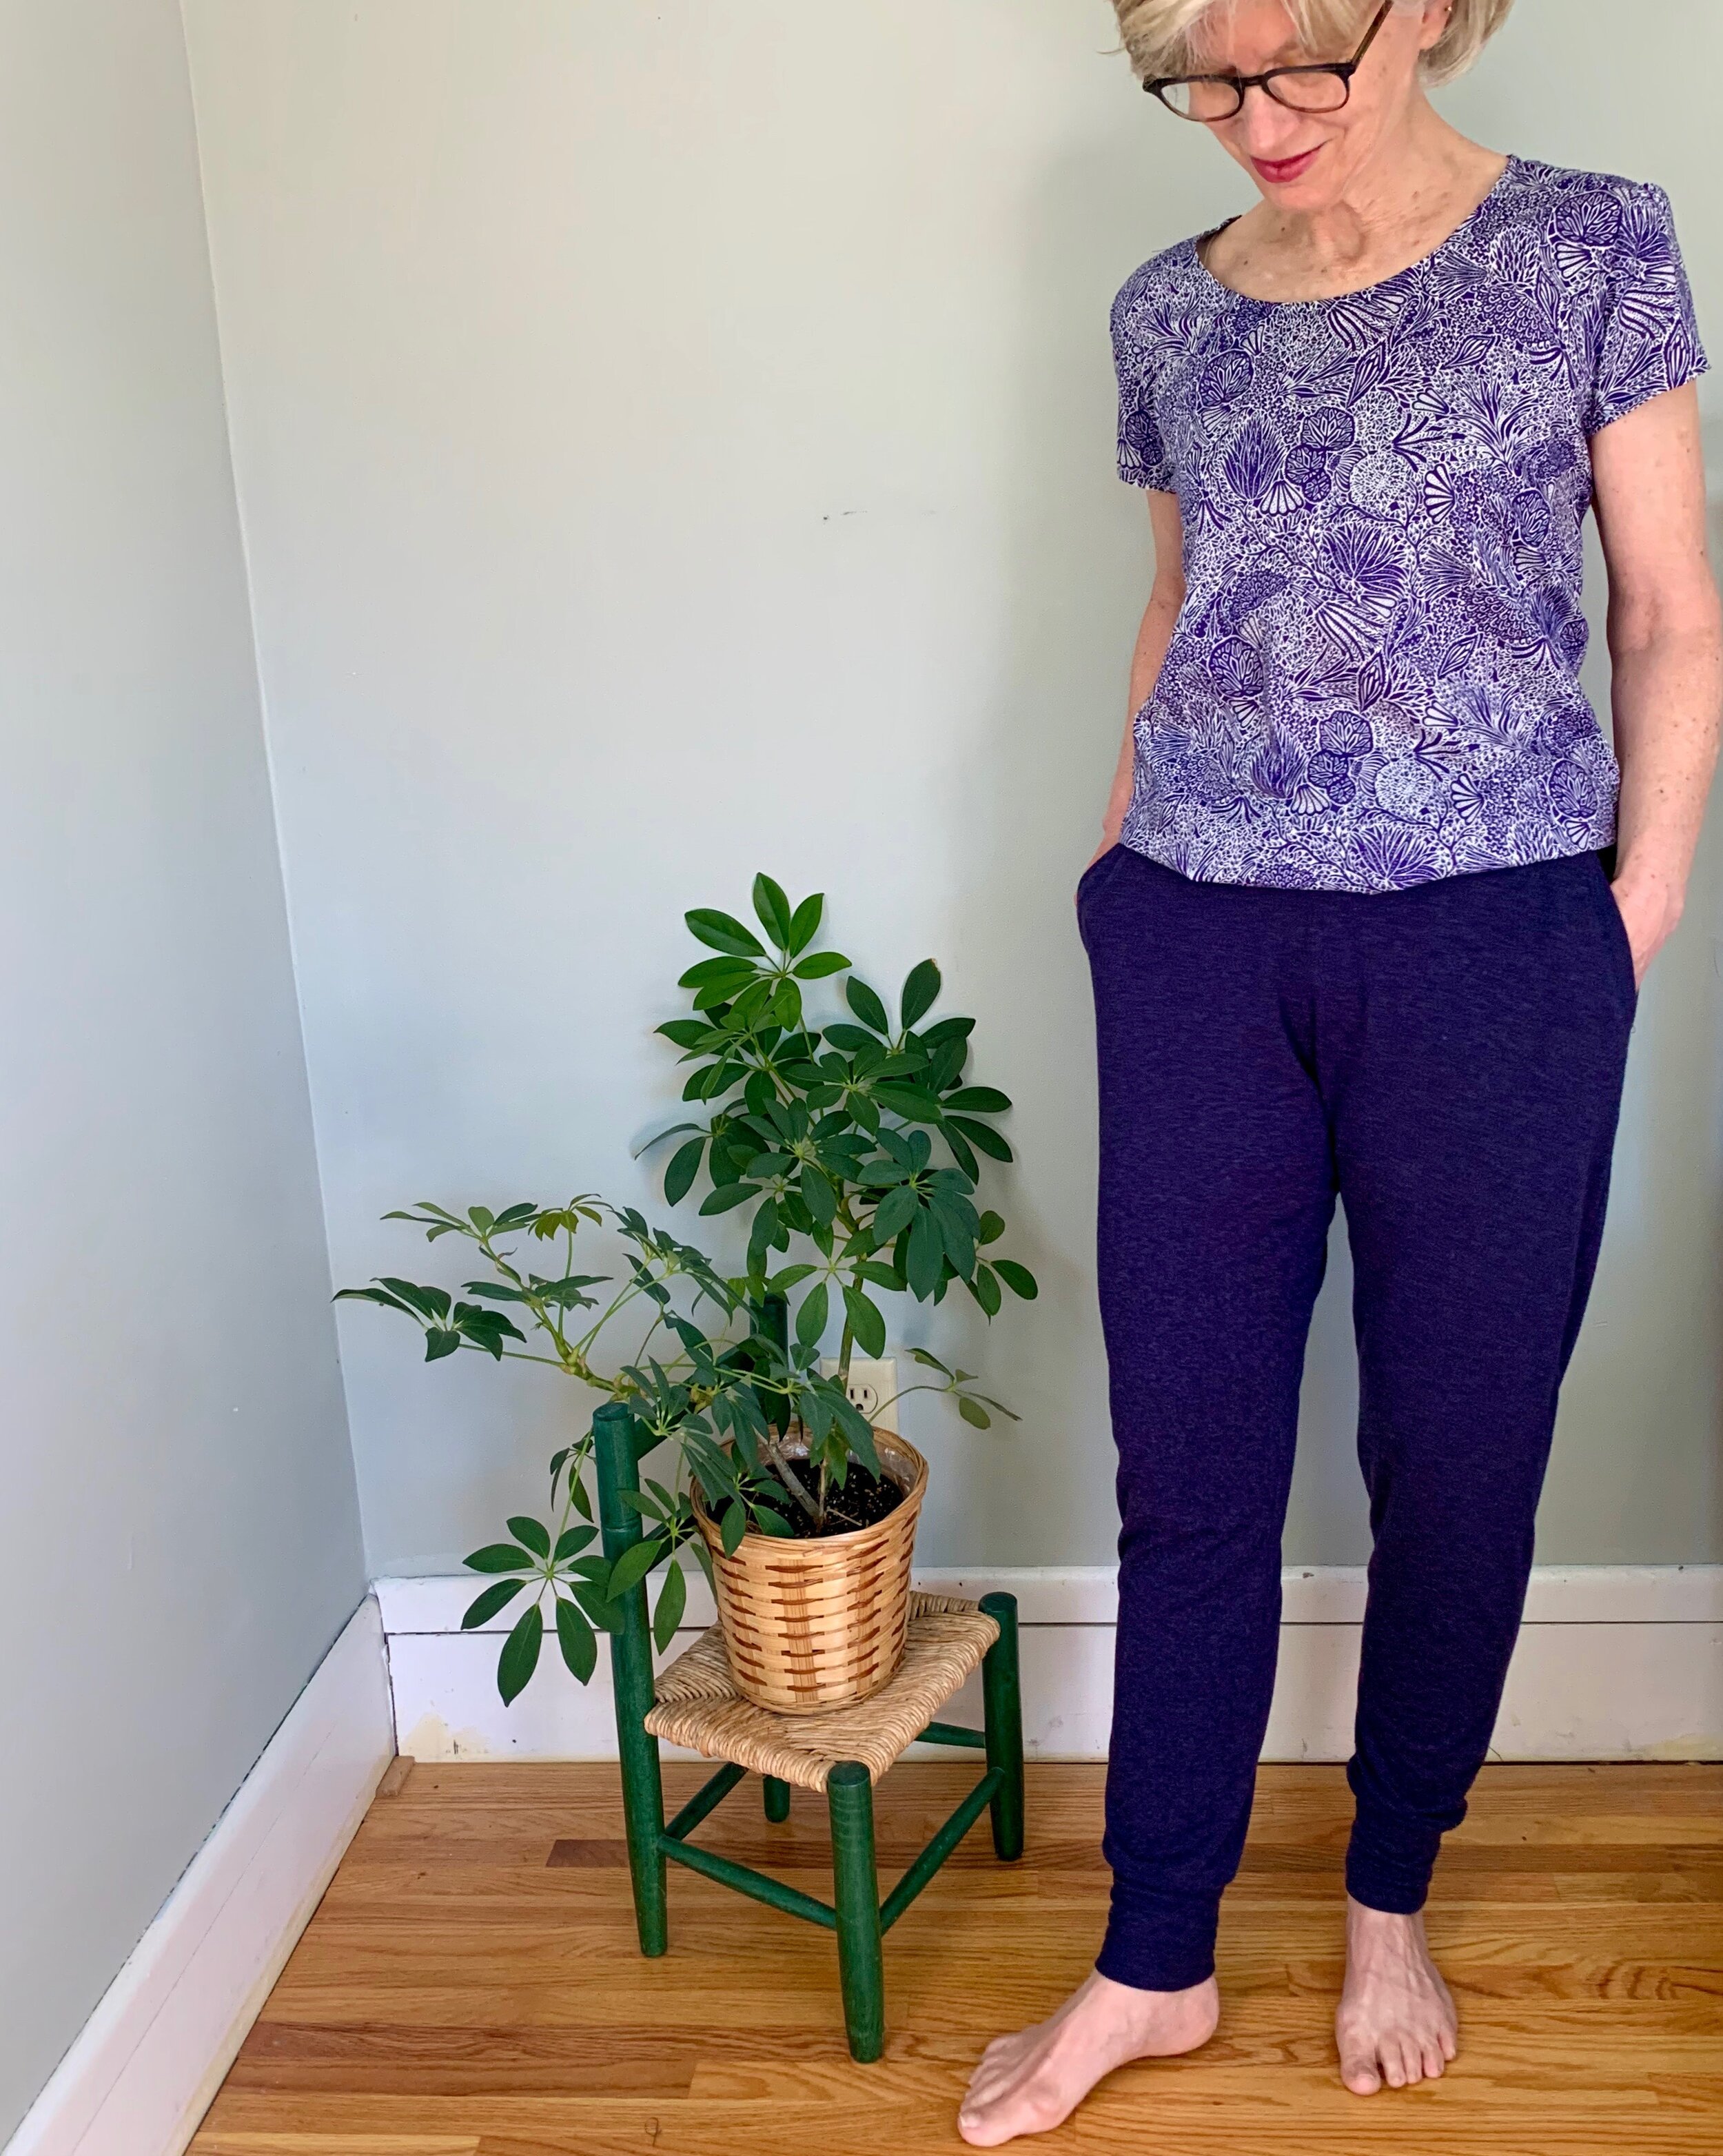
In any case, I am super pleased with this project.  I had this fabulous blue cotton spandex knit fabric from Mood Fabrics in my stash, and I wanted a dress with plenty of ease of movement and comfort for summer antics.  This is a dress I can ride my bicycle in.

IMG_6994.jpg

To make this dress I began with my favorite t-shirt pattern which is the Ruska t-shirt in the book Breaking the Pattern by Named Clothing.  And then I simply added a big rectangle skirt.  The only tricky part was the pleats and this is where the fun -and another paradox- began. 

IMG_6961.jpg

I wanted to use pleats for the skirt for a flatter and fancier finish than gathering the skirt. I decided to use knife pleats which are a simple pleat where the folds are pressed to one side in the same direction which makes the pleat three layers thick. The knife pleat can be used as a style effect or across the entire part of a garment, as I did with this skirt. Knife pleats are the style of pleat used for kilts.

Since I didn’t have a pattern, I needed to figure out how to pleat this entire skirt. Happily, while searching for tips for measuring and creating knife pleats, I found a trick that eliminated measuring and marking. You can simply use a FORK to create knife pleats!   Another paradox. I read the written instructions, but couldn’t puzzle it out until I watched a YouTube instructional video here.  Basically, you insert the fork and turn the fabric and fork toward you for a full turn, and sew. This was not only easy and fast- it was super fun. Watch me start pleating EVERYTHING now.

IMG_7109.jpg
IMG_7110.jpg

The only other decision point on this dress is how long to make the drop waist. I am long waisted and fiddled quite a bit, but ended up letting the hemline dictate the placement.


Working from Home in Hudsons

Stay at home – work from home orders were also marching orders to finally make myself a pair of the well-loved Hudson Pants by True Bias.  Participating in online team meetings means I only need to look strictly business from the waist up.  I wear leggings quite a bit for leisure wear and on weekends. The Hudson jogger is still stretchy and slim, but a little different than a legging. I was looking forward to another comfy leisure bottom option- still slim but not completely skin tight.

IMG_5211.jpg

I previously made Hudson pants for a few of the young men in my life- and I intended to make myself a pair- but kept getting distracted by those flashy, dress-up projects. Here’s an example of the Hudson pant for men I made for Adam:

IMG_6366.jpg

A major attraction of the Hudson pants is their feminine fit – somewhat slimmer than the typical jogger pant.  I cut a size 4 and did not grade out a size at the hips according to my measurements- and I still had plenty of ease.  The fabric is plenty stretchy, so I wasn’t worried. I used a merino wool blend jersey.  This fabric is fairly lightweight, but with the wool content, they are perfectly cozy.

These are definitely a quick make. They are thoughtfully drafted and the instructions are straightforward- check out the pockets. Even though there are only a few construction steps- I actually skipped a couple. I kept the waist band flat and simple by skipping the stitching through the elastic, and I also omitted the tie front. I opted for a flat and clean waistline finish. Next time I will shorten them by a wee amount to prevent any pooling at the ankles. But overall, I love them and already plan to make another pair.

IMG_5557.jpg

This jersey is a beautiful -but different -shade of blue that happened to match perfectly with a Grainline Scout Tee I made ages ago out of Liberty fabric.  I like a woven tee shirt, and the Grainline pattern is aces.  The fit and ease is super comfortable.  Again an easy and thoughtfully drafted project.  It’s surprisingly easy to get in and out- no tugging or struggling that might happen with some pullover woven tops-even with those slim sleeves.  Another star feature of the Scout pattern is the perfect not to high-not too low neckline that lays super flat.  

IMG_5565.jpg

I cut a straight size 2, going off my bust size- and once again I didn’t grade out for waist and hips- so it’s a bit slimmer around the waist and hip.

No buttons, snaps, zips or any other stumbling blocks for either of these patterns. These separates are a leisurely make and ideal for leisure at home wear.

Another Esme, Easter, and necessity

Necessity is the mother of invention- or as Plato penned in The Republic, "our need will be the real creator"

Plato’s philosophy is definitely on over-drive this Spring as creative solutions are plied every day- from finding alternatives to personal protective equipment, elastic, real life gatherings, hand sanitizer, toilet paper, and so on.

This holiday weekend I got creative in light of shortages, and the end result is better than if I wasn’t caught short handed. I needed a palette cleansing project after making face coverings all week, and I also craved something to brighten up Easter in isolation. I knew I had a sweet Easter themed fabric in my stash: Cotton and Steele’s Wlldwood Fable.  I bought a yard of this last year from Lakes Makerie, because when I stopped in the owner was making adorable table runners out of this fabric.  I simply couldn’t resist the squirrels and bunnies and left with a yard of it- just because.  A yard is pretty limiting, but I was determined to make something festive that I could wear for our Easter zoom gathering with my family.  

IMG_1851.jpg

So I squeezed out a simple little top. I knew the Esme top in Lotta Jansdotter’s book Everyday Style would be a quick make. And here is the necessity and invention part of the story: because I couldn’t make the sleeves as long as I like- I used the selvedge of the fabric to create a decorative hem detail. 

IMG_1813.jpg

If I had enough fabric to make the top, I wouldn’t have added the little sleeve finishing detail.  But I think this feature makes the top more interesting.

IMG_1815.jpg

I also used a wide bias tape remnant to keep the top as long as possible>

IMG_1814.jpg

Here’s another happy result of creative problem solving.  My Mom and Dad typically host our annual Easter Holiday family gathering.  This year, due to the pandemic and stay home orders, we set up a Zoom meeting for the 33 members of their family.  Halfway through the virtual party and after several updates from children and grandchildren and great grandchildren, my mom noted that the online get together was in some ways better than the typical Easter party.  For one, it was the first time the whole family was “together” for Easter in many years.   In addition, my mom noted that this year she could listen to all the kids and grandkids; because when we celebrate in person at her house, she’s often busy in the kitchen and misses many of the updates.

And, here’s another solution found due to need. I didn’t have any egg dye, but found a way to decorate the Easter eggs in a new and pretty way.

IMG_1803.jpg

Lotta love: Pilvi and Esme

Pre-pandemic, my sewing plans for March included making a project (or two) from the sewing book Everyday Style by Lotta Jansdotter. I had my eye on this book for nearly a year, and I finally got the nudge I needed to purchase it when Sue Stoney and Ali @robinsnest1926 announced a Lotta challenge on Instagram.  I love the Scandinavian design and styling in this book- it is modern, unfussy and joyful. As it turns out, sewing from Everyday Style was the perfect antidote to our current upended world. The projects I made provided a much needed tonic for these complicated pandemic days. Both of the projects are happy and effortless.

IMG_0823.jpg

I made the Esme Tunic first.  I am one of those rare birds that actually likes a woven pullover top.  I think it’s because I am most comfortable sewing woven fabrics.  The Esme features a great looking neckline and French style darts and facings.  I made a wearable toile from a Japanese cotton canvas from Treadle Yard Goods that I found in my deep stash.  I think I actually purchased this material for a home dec project that went wayward.  This isn’t a color I normally wear- or let’s be honest- previously have never worn!  But, it sure is happy, and yellow is definitely prominently featured in the styling in this book. 

IMG_9706.jpg

First step is to trace off the pattern pieces.  The seam allowances are included- so it’s actually super quick.  Also the top has only a few pattern pieces.  I cut out a straight size extra small even though according to the measurements, I should have graded out a size for waist and hips.  But the top looked like it had plenty of ease and that was a good call.

IMG_9697.jpg

This is a super straightforward and simple top.  I like the easy cut and -I may be old school- but I actually prefer a neckline facing to bias binding.  There is plenty of ease across the back and shoulders and through the sleeves- bonus.  This proved very comfortable to wear- the drafting is spot on.  The instructions call for top stitching around the neckline, but I omitted that because the print is busy.  I simply under-stitched the facings and they lay perfectly flat. I found I had only an inch for a hem which I think looks a little skimpy if it’s top-stitched, so I hand sewed a blind hem. 

IMG_9698.jpg

My second project from the book is the Pilvi coat- which is actually the pattern that first attracted me to this book.  This is a super clean and simple style. The only trick was finding a fabric that was interesting but not crazy. I happily stumbled over the fabric of my dreams at the Sewing Lounge.  The fabric is PERFECT for this coat.  It is a hefty polyester jacquard with great body and a fabulous happy print.  Again, this fabric and pattern proved to be a necessary mood boost for troubling days. 

IMG_0232.jpg

I LOVE the look and fit of this coat.  It is easy and comfortable and the raglan sleeves give perfect range of motion.

IMG_0293.jpg

The only tiniest complaint is the sleeve length is short.  I like a three quarter sleeve length, but I had minimal length for the hem on the sleeves.  For reference I am 5’ 4”.  The coat body length, however, is generous- I had to trim 2 inches and still had a substantial hem.

The only time consuming part of this project is finishing the seams.  I used a Hong Kong finish- which I discovered is not the same as a bias finish- explained beautifully by Colette here.  For my Hong Kong finish I purchased bias tape- since the fabric is polyester a cotton polyester blend is perfectly fine and the store bought blue was a good match. For a Hong Kong finish, the binding on the wrong side of the seam allowance is left unfolded- which reduces bulk. For directions on bias bound seams, see Colette’s instructions here.

IMG_0899.jpg

Both the Esme tunic and the Pilvi coat patterns are also remarkable because they are modeled in the book by women who are 50 years of age or older. Definitely LOVE and am happy to support pattern makers who include older models in styling and other marketing for the pattern. Thanks Lotta!

IMG_0316.jpg

Dress to Shirt Story

It’s February and it has been mild in Minnesota.  Maybe that’s why I was drawn to this romantic Liberty print that I purchased a while back from The Fabric Store- or maybe it is lingering Valentine’s day sentiments.  In any case, even though it is still winter, the floral print on a black background means I can easily pair it with cold weather separates.  I had just enough fabric to make a blouse or top.  I perused my button down shirt patterns, but got sidetracked and went down a different path landing on McCalls 7242 dress pattern which I had not made previously- but have admired from afar.  See Lori’s version here and Erica’s summery version here

IMG_9331.jpg

Going from dress to blouse is a super easy pattern hacking project. So this is a short story- but hey, it’s a short month. 

I have waxed poetic over the virtues of Liberty cotton lawn previously, but let’s count the ways again.  I admit Liberty fabric is pricey- but for print and fiber quality- it is worth a splurge.  Liberty lawn is made using fine, high-thread count yarns- (think high thread count sheets for comparison).  Higher thread count means a finer and silkier feel. For the sewist, high thread count also means that the fabric never wobbles (so it’s a breeze to cut out) and the edges stay sharp- read -no fraying.  It is also particularly easy to construct French seams and narrow hems- which are essential on a button down for smooth wearability on the insides.  While woven cotton lawn isn’t as comfy as your t-shirt- it is the next best silky comfortable thing- it just doesn’t have stretch.

IMG_9391.jpg

 Happily, this pattern is well cut, and not constricting at all- so you don’t need any stretch.  I like the neckline and simple front. I simply added length to the front and back pattern pieces which I did by simply lining up another button down blouse pattern I had on hand to measure length of front and back.  This was a super quick make as there is no banded front. I used French Fuse for the collar and front facings and for the cuffs. You will notice I didn’t have enough fabric to line the back yoke, so I used a very lightweight black pima cotton I had on hand. It looks sharp inside.

IMG_9389.jpg

 I skipped top stitching the collar and front, because everything laid neat and tidy without it.  I secured the collar by stitching in the ditch.

IMG_9263.jpg

The sweet buttons are from Treadle Yard Goods

IMG_9317.jpg