Pattern love

This post is devoted to one of my best loved, most often used patterns. 

I LOVE this Vogue apron pattern.  This is what I am wearing today - while making special dinner at home for my Valentine - and what I wear whenever I need to be fancy in the kitchen.

IMG_1174.jpg

At first glance, this may look like a superfluous pattern- done up in silk organza on the pattern illustration.  But don’t be fooled- this pattern is a workhorse. The pattern has great curved seam finishes and a nice shape and -well- it fits everyone perfectly! How great is that?!  This is a pattern I do not fiddle with and cannot improve upon.  I have made this apron countless times. While I typically make it in cotton or linen, I have actually made it in silk twice- as shown above and below.  I have made several of these aprons for the family and others to give as gifts.


IMG_1132.jpg

Apron GLAMOUR!

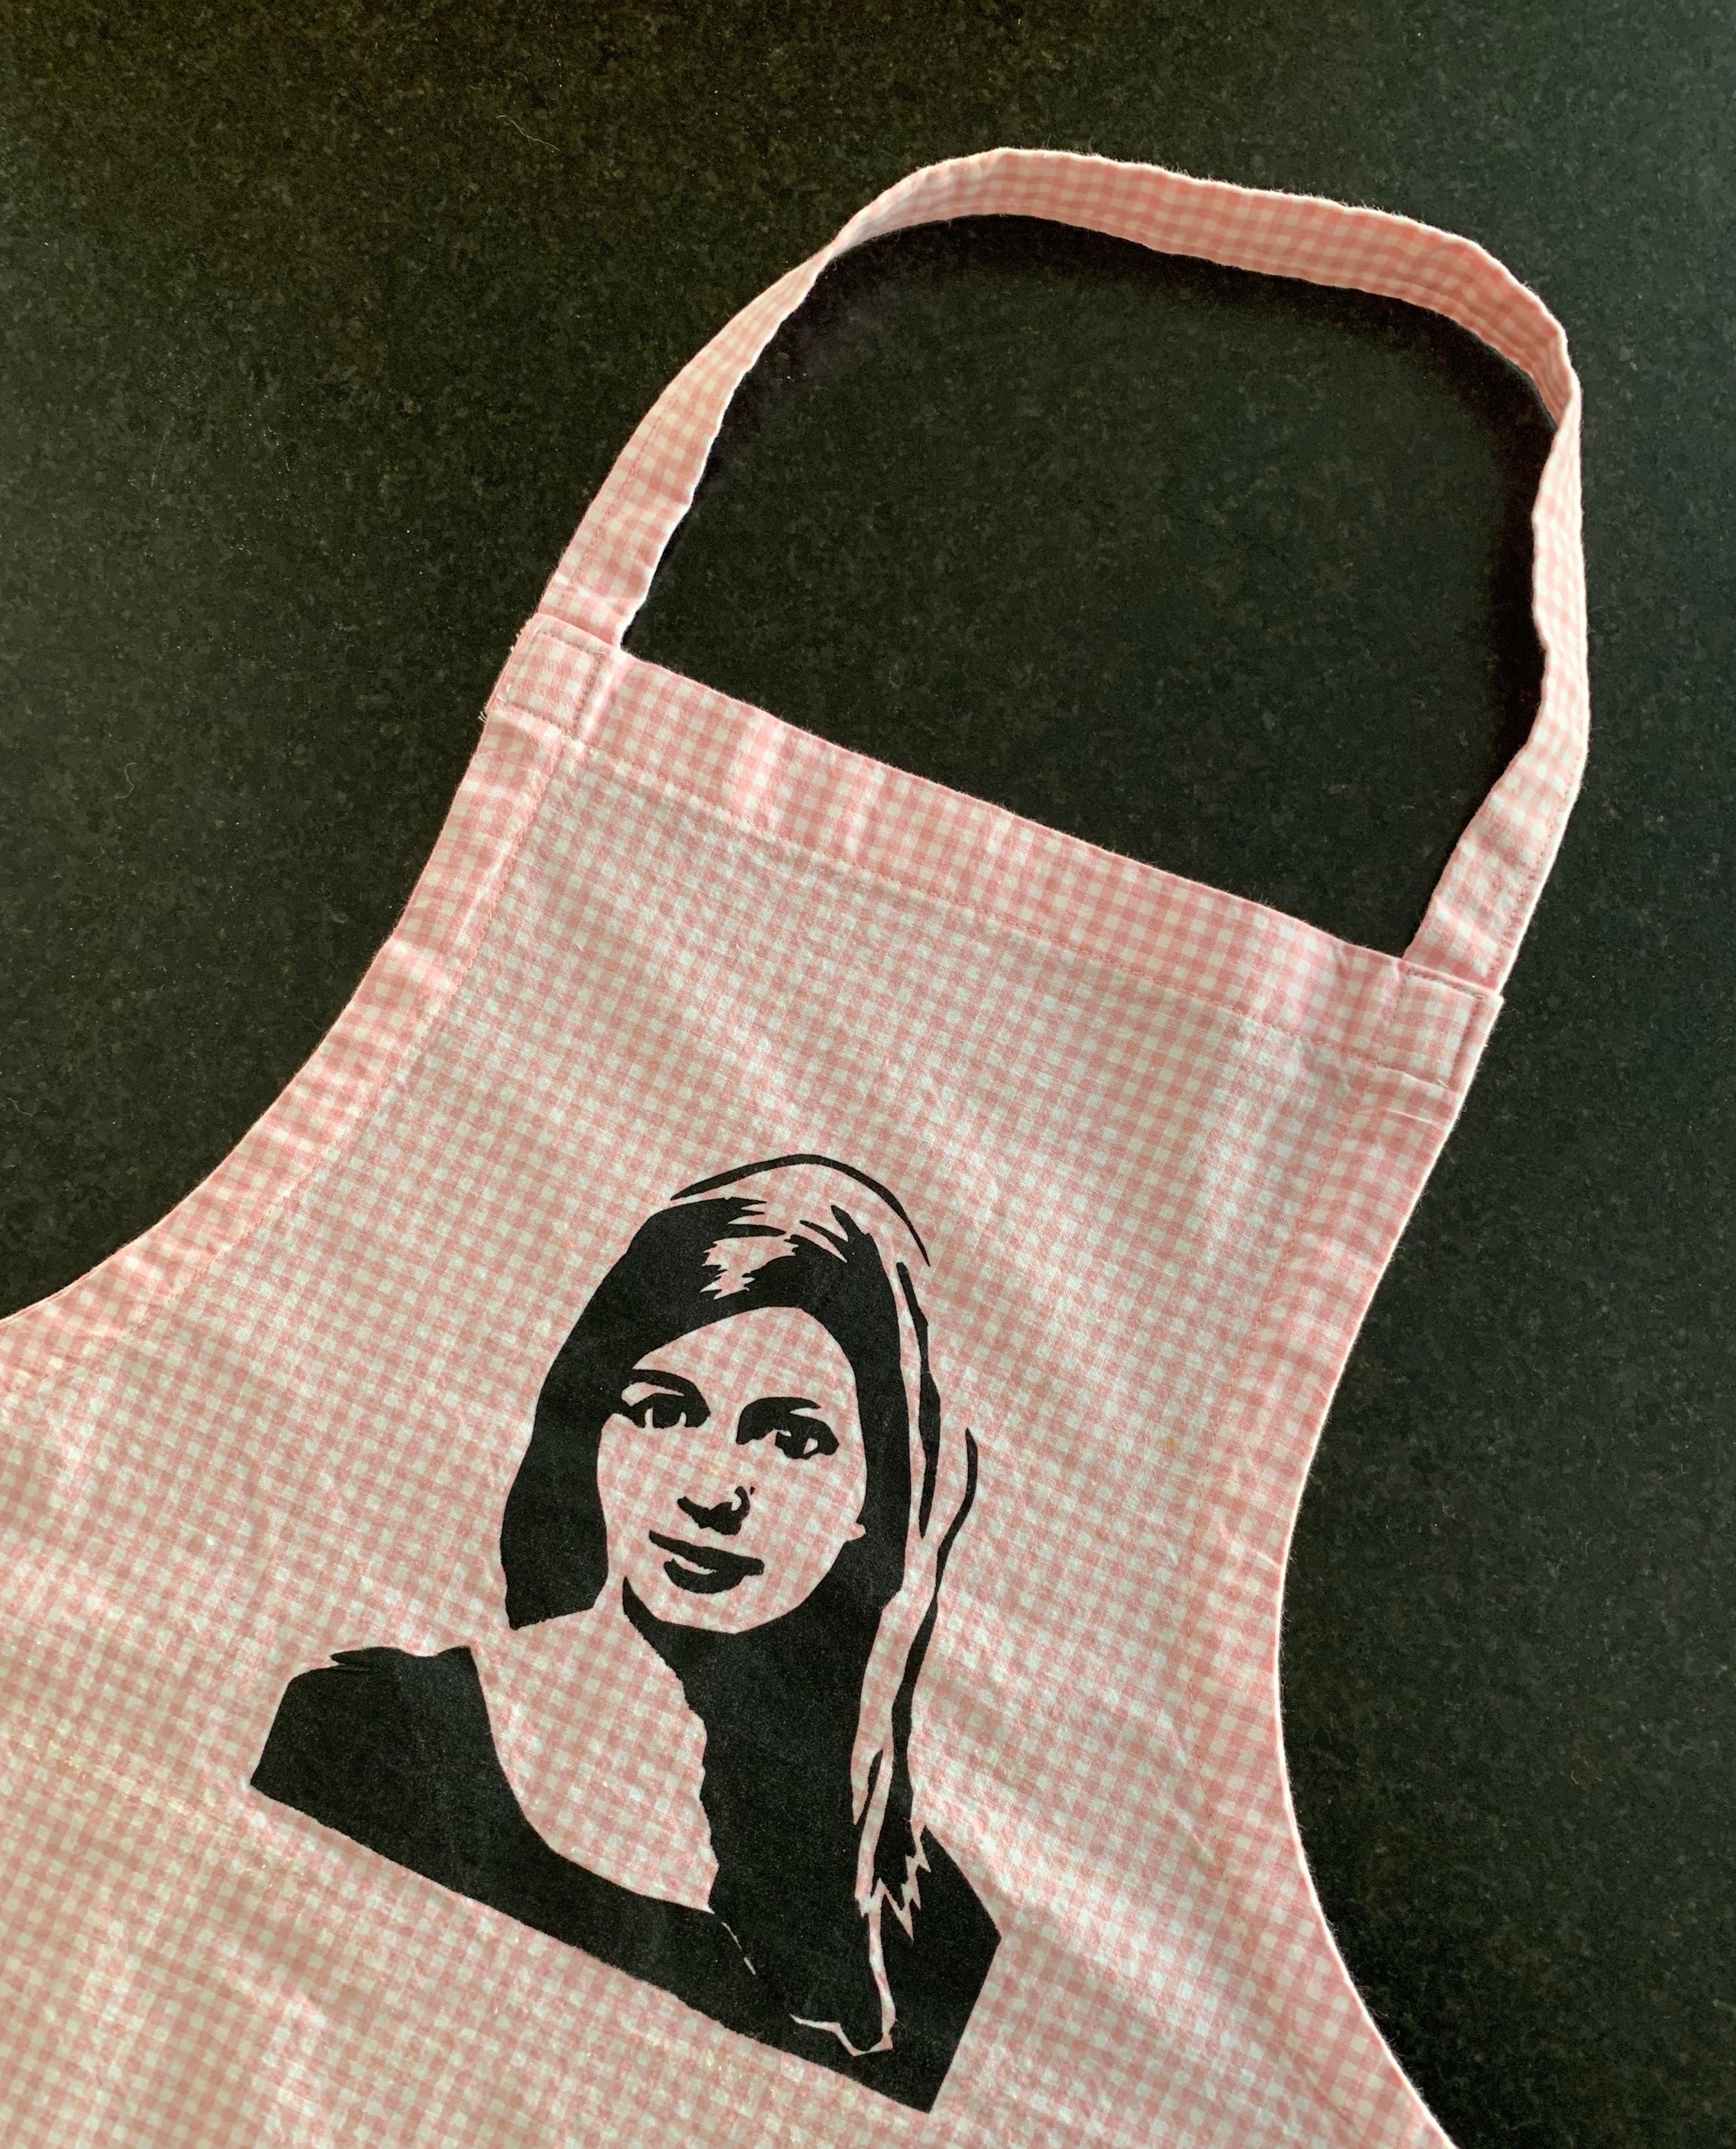
For a recent bridal shower and a few very special parties, I made up three or more of these aprons for daughters and helpers to wear in a fabric to match the party theme/décor- yes, I am that kind of person.  And because middle daughter has genius silk screening skills, we silk screened youngest daughter’s image on this apron -made up in gingham- for her high school graduation party.  Don’t look closely at the seam work- you know I was making this in a hurry.

IMG_1314.jpg

Burda in a bold hue

i freely admit that I like Valentine’s day.  While Valentine’s Day has it’s detractors, I proudly stand behind a holiday that promotes love -and conversation hearts.  February can be dark and cold- and the holiday is a welcome distraction.  When my kids were young, we celebrated this holiday big time. We always made handmade Valentine’s day cards for school exchanges.  I routinely made some sort of heart themed (or pink) gift for them: felt hearts appliqued on t-shirts, heart trimmed pillow cases, heart wristbands- you catch my drift. 

IMG_1269.jpg

Now, the kids are older and a little less into pink and equally less into hearts on their belongings.  I have come to terms with the fact that they celebrate this holiday in more subtle ways.  But that won’t stop me from wearing pink this week.

IMG_1291.jpg

This top is actually made up with leftover fabric from my youngest daughter’s dress project. This very berry pink cotton pique is from the marvelous Treadle Yard Goods

IMG_4814.jpg

The pattern is Burda 6914, and in my true fiddling style- I changed the sleeve a tiny bit and eliminated the slits on the hem.

Not a statement sleeve

I had this fabulous rayon print that I purchased to make something to wear over the holidays.  There is a lot of cooking and entertaining at our house- so I need a functional garment.  But there are also lots of guests and visitors, so I want to look spiffy.  And it’s cold here- I live in the North- so I need to be covered up.  I decided to make a basic jewel neck top but was undecided about the sleeve style.  Sleeves- I admit that I have made more than a few flouncy statement sleeves on garments as sleeve details are very current- but wait, it looks like sleeves have always been a thing: see vintage sleeves!.  Even though there are a myriad of interesting sleeve options, for this top, I opted for “sensible” rather than “statement”  sleeves.

IMG_0541.jpg

I hacked this Cynthia Rowley Pattern for the top.  This Simplicity pattern is discontinued- and there are easier ways to make a basic top - for example you could use this. Anyway, I altered my pattern by drawing a lower neckline, eliminating the slit and drafting a simple front neck facing.  Then I added about an inch of width on each side.  I also skipped the zip and added a very simple loop/button closure in the back.  I lengthened the sleeve and I used wide elastic that I had on hand. 

IMG_0555.jpg

Sensible sleeve success.  The sleeves are in control and best of all- these sleeves are easy to wear! Practical elastic cuffs keep sleeves neat and in place so I can cook and accomplish other business at hand.

IMG_1005.jpg

Here is a back view!

Mild mannered moto jacket

I have always been drawn to leather moto jackets- they are so chic- but I never felt I could pull this style off authentically.  When I stumbled across the moto jacket in this Butterick pattern. I decided to give it a try in a softer, gentler fabric choice.

IMG_8261.JPG

I used a boiled wool from Emma One Sock. There are plenty of these boucle fabrics around- you can find them in 100% wool- typically more expensive -or in an affordable wool rayon blend like I used. 

IMG_0813.jpg

The fabric is drapey- so the jacket looks a lot less structured than in the pattern pic. It was easy to sew up, but I ran into TWO fit related problems.  Even though I cut the jacket in the smallest size- it was too large and sloppy in front.  So, I took the jacket apart. Yes- this was after it was put together AND after I had already topstitched the seams -ARGH!  I scaled down the front bodice pieces and kept the body pieces of the back and sleeves mostly intact.

IMG_0777.jpg

Second- you will notice the hem extends beyond the zip- once I tried it on, I wanted more length.  I may be short, but I have a long waist.  I ended up using a knit binding to face the hem for additional length. Because the look is soft and sweater-like, I didn’t add a lining. 

StyleArc Sadie Tunic

I am constantly looking for an easy and interesting woven top.  I love my button downs, but sometimes I am in the mood for something a bit less serious- but still classy.  I experimented with several tunic style tops, but had yet to come up with a winning style. Then, I stumbled upon the Sadie by StyleArc. I was tempted by the Sadie because of the classy and interesting features:  the sweet boat neck, the French darts, the interesting hem finish, and those sleeves!

IMG_3633.jpg

This was my first StyleArc pattern and I ordered the PDF online.  The multi size pattern pieces and instructions were clear. I cut my usual pattern size and the fit was TTS.

I eliminated the back closure because I knew I wouldn’t need it with the wide neck.  I also shortened the tunic which is a typical adjustment for me.  The fabric is a linen cotton blend from the fabulous Treadle Yard Goods- a winning solid- not quite solid.

IMG_0684.jpg

The sleeves were totally a blast to put together. A bit of a puzzle and a fun surprise. I just followed the clear instructions. They remind me of origami projects- where you aren’t quite certain what will turn up until you fold, turn and reveal.

IMG_0926.jpg

The top is easy to make and super comfortable as a throw on and go option.